

Pav bhaji is one of those classic Indian dishes that instantly brings comfort, color, and absolute excitement to the table. It is spicy, buttery, aromatic, and deeply satisfying, which is exactly why it has become a beloved favorite across generations. What makes pav bhaji so special is not just the taste, but the entire, beautiful experience of eating it. The hot, heavily mashed vegetable curry paired with toasted, butter-soaked pav creates a meal that feels like a festive celebration, even on an ordinary weeknight.
For many of us, restaurant-style or street-side pav bhaji holds a very specific charm. It tastes richer, smoother, and far more balanced than a quick, thrown-together homemade version, and that is what makes learning how to recreate it at home so incredibly rewarding.
The good news is that achieving that exact restaurant-style magic in your own kitchen is completely possible. You do not need a professional flat-top tawa, and you certainly do not need complicated, hard-to-find ingredients. What you do need is the right method, the correct balance of vegetables, a proper understanding of the spices, and a little bit of patience while the flavors marry together.
Once you understand how the base works, you can make a bhaji that tastes every bit as delicious as what you would order at a legendary food stall. In fact, homemade pav bhaji often tastes even better because you can adjust the butter, the spice level, and the final texture exactly the way your family loves it.
What Makes Street Food Pav Bhaji Different

Restaurant-style pav bhaji is fundamentally different from a basic, home-cooked mixed vegetable curry because of its unique texture, the profound depth of its flavor, and its unashamed, generous use of butter. In a restaurant setting, the vegetables are cooked until they are completely soft, allowing them to be mashed into a thick, smooth, yet slightly rustic curry. The masala is built in careful layers so that every single bite tastes perfectly balanced, rather than just hitting you with flat, fiery heat.
Restaurants also rely heavily on butter during the cooking process. This isn’t just for indulgence; the butter emulsifies with the tomato-onion base, giving the bhaji its signature glossy finish and a rich, velvety mouthfeel. The pav is never treated as an afterthought, either. It is split open and toasted properly on a hot griddle until the edges turn golden and crisp while the inside remains pillowy soft, often soaking up a mixture of melted butter, fresh coriander, and a pinch of pav bhaji masala.
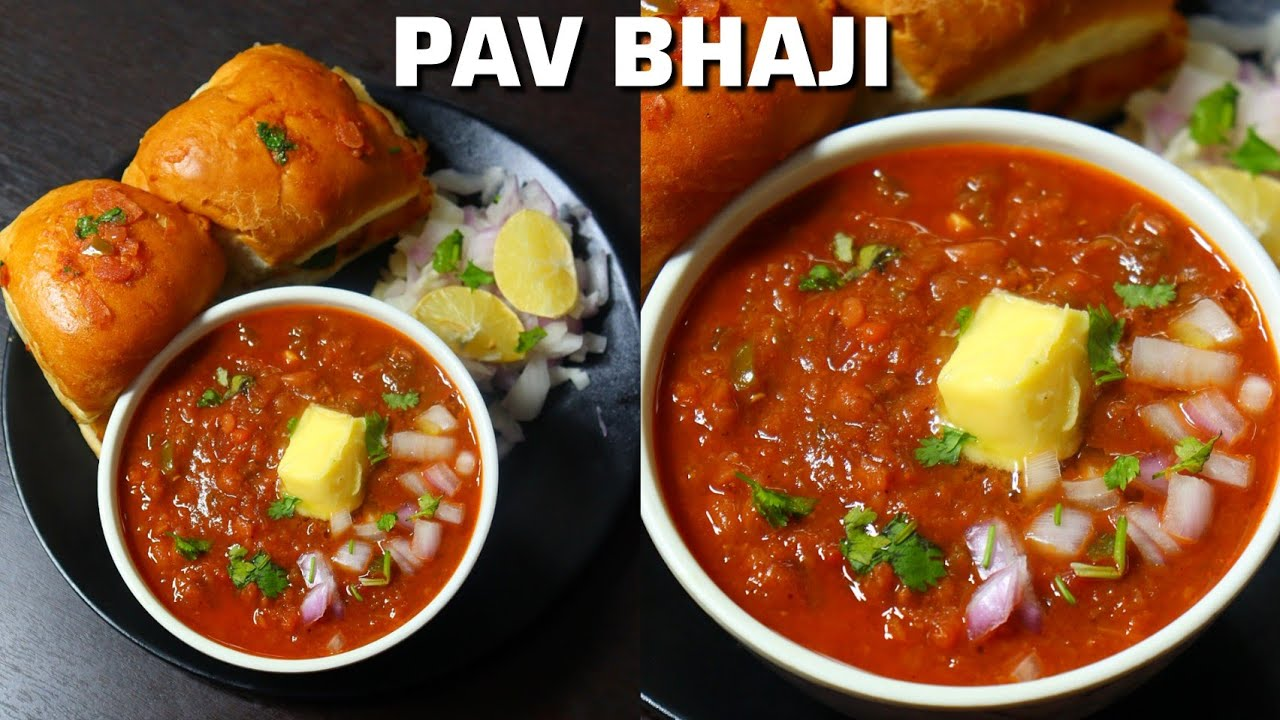
Another reason street-side pav bhaji tastes so magical is the final finish. A sharp squeeze of fresh lemon juice, a crunchy handful of finely chopped raw onions, bright coriander, and a cold dollop of butter melting into the hot curry create a beautiful contrast of temperatures and textures. When you reproduce these exact steps at home with genuine attention to detail, you get that same iconic street food experience right at your dining table.
Gathering Your Essential Ingredients Of Pav Bhaji

The beauty of pav bhaji lies in how it transforms incredibly humble, everyday vegetables into something bold, complex, and luxurious. The vegetable base almost always relies on a core group: potatoes, cauliflower, green peas, carrots, capsicum, and tomatoes. Potatoes are the ultimate anchor here; they provide the essential body, starch, and thickness needed to bind the curry together. Cauliflower and carrots add a gentle, earthy sweetness that balances the spices, while green peas contribute both flavor and a beautiful color.
Capsicum, or green bell pepper, is a secret weapon in street-style bhaji. It brings a fresh, slightly smoky, and pungent note that cuts through the heavy starch of the potatoes. Tomatoes, meanwhile, provide the essential tangy, acidic foundation that gives the bhaji its vibrant character. Beyond the boiled veggies, you will need finely chopped onions, a fresh ginger-garlic paste, green chilies, turmeric, Kashmiri red chili powder (for that brilliant, deep red color without scorching heat), and a high-quality pav bhaji masala blend.
For the bread, look for fresh, incredibly soft pav buns that can handle being compressed and toasted on a hot pan. The butter should be fresh and used without hesitation, as it is the vehicle that carries all the aromatic spices. Never skip the garnishes—the raw onions, coriander, and lemon wedges are non-negotiable components that elevate the dish from a simple meal to an authentic experience.
The Art of Prepping and Boiling the Vegetables For Pav Bhaji

The first major milestone on your road to perfect pav bhaji is cooking the vegetables the right way. The ultimate goal is to get them so incredibly tender that they offer absolutely no resistance when you go to mash them. While boiling them in a regular pot or steaming them works fine, using a pressure cooker or an instant pot is highly recommended. It saves time and ensures the vegetables are uniformly soft from the inside out.
However, a common mistake is adding far too much water to the cooker. If your vegetables are swimming in liquid, your final bhaji will turn out thin, watery, and separated, forcing you to boil it for an eternity to reduce the moisture, which can dull the fresh flavors. You want just enough water to cover the vegetables.
Cut your potatoes into medium-sized pieces so they cook at the same rate as the cauliflower florets, peeled carrots, and peas. Interestingly, many top street vendors prefer to keep the capsicum and tomatoes out of the initial boiling process, choosing instead to cook them directly in the hot masala later on so they retain their distinct, punchy flavors. Once your boiled vegetables are fork-tender, give them a light, initial mash while they are still hot, keeping the vegetable stock aside to adjust the consistency of your curry later.
Cultivating a Deep and Aromatic Masala Base

The masala is the true heart and soul of the pav bhaji. This is the stage where you build the foundation of flavor that separates the amateurs from the pros. Start by heating a generous amount of butter—perhaps mixed with a splash of oil to keep the butter from burning—in a wide, heavy-bottomed pan or a large flat skillet. Add your cumin seeds, and let them crackle before tossing in a mountain of finely chopped onions and green chilies.
You must take your time cooking the onions. They shouldn’t brown heavily or caramelize into a deep dark color; instead, you want them to become completely translucent, soft, and slightly golden. This releases their natural sweetness, providing a perfect counterpoint to the acidic tomatoes. Next, add the ginger-garlic paste, cooking it until the raw, pungent aroma completely disappears, leaving behind a warm, inviting scent.
Now, drop in the finely chopped tomatoes and capsicum. Cook this mixture patiently until the tomatoes break down entirely, losing their shape and morphing into a thick, jammy, and pulpy paste. You will know it is ready when the butter begins to separate and pool around the edges of the masala. Turn the heat down and add your dry spices: the pav bhaji masala, the Kashmiri red chili powder for that iconic crimson glow, turmeric, and salt. Sautéing these spices directly in the warm butter for a minute allows their essential oils to bloom, creating a fragrance that will instantly fill your entire home.
Merging the Elements and Mashing the Curry

Once your aromatic tomato-onion masala is bubbling and perfectly cooked, it is time to introduce the boiled, lightly mashed vegetables to the pan. Mix everything thoroughly so that every bit of the vegetable mash is coated in the vibrant spiced base. This is where the real physical work—and the fun—begins.
Grab a sturdy potato masher and begin mashing the mixture directly in the pan while it simmers on medium-low heat. Mashing the vegetables into the hot masala ensures that the spices are deeply driven into the fiber of the potatoes and cauliflower, rather than just sitting on top of them. As you mash, the mixture will become incredibly thick. Gradually add a little bit of the reserved vegetable stock or hot water to keep things moving.
The consistency you are aiming for is critical. It should be a unified, cohesive curry. If you stop mashing too early, you will end up with a chunky vegetable stew. If you overprocess it or use a blender, it will turn into a baby food puree, completely ruining the mouthfeel. You want a beautifully smooth, thick, spreadable consistency that still possesses a rustic, tiny bit of texture. Let the bhaji simmer gently for at least ten to twelve minutes after mashing so all the independent flavors melt into one single, glorious identity.
Tweaking the Texture and Finalizing the Bhaji

Achieving the perfect restaurant-style texture requires a bit of intuition as the bhaji sits on the stove. A perfect bhaji should hold its shape slightly when spooned onto a plate, yet it must be loose and yielding enough to be effortlessly scooped up by a piece of soft bread. If it looks dry or starts sticking to the bottom of your pan, do not hesitate to stir in a few splashes of hot water. Never use cold water at this stage, as it will shock the curry and separate the fats from the liquid.
As the bhaji goes through its final few minutes of simmering, taste it critically. This is your chance to adjust the seasoning. Need more heat? Toss in a tiny bit more chili powder or a finely minced green chili. Feels a bit flat? A splash of fresh lemon juice right into the pot will instantly wake up all the sleeping flavors.
Right before you turn off the flame, drop a fresh, cold cube of butter right into the center of the hot curry and sprinkle a handful of finely chopped coriander leaves over it. Cover the pan with a lid and let it rest off the heat for five minutes. As that final piece of butter slowly melts into the residual heat of the bhaji, it creates a gorgeous, glossy sheen and a silky smoothness that mirrors the exact presentation of your favorite street food vendor.
Toasting the Pav to Buttery Perfection


A spectacular bhaji deserves equally spectacular pav. Standard, cold, dry bread will completely ruin the experience, no matter how good your curry tastes. To toast your pav like a professional street vendor, heat a flat griddle or a tawa over medium heat and melt a highly generous amount of butter across the surface.
Slice your pav buns horizontally, keeping them attached at the back hinge if possible. Open them up like a book and lay them flat, cut-side down, directly onto the melted butter. Now, here is the ultimate insider trick used by the best street food stalls: before you place the bread down, drop a tiny pinch of pav bhaji masala and a few strands of fresh coriander directly into the melting butter on the griddle, then rub the bread through it. This ensures the pav captures the exact flavor profile of the curry.
Press down gently on the buns with a spatula or your fingers, allowing the bread to act like a sponge, soaking up the spiced butter. Let it toast until the inner surface develops a beautiful, light golden-brown crust that offers a subtle crunch. Flip the pav over for just a few brief seconds to warm the outer crust, keeping it soft, pillowy, and pliable. The contrast between the slightly crisp, buttery interior and the cloud-soft exterior of the bread is absolute perfection.
Presentation, Garnishes, and the Joy of Eating

When it comes to serving pav bhaji, presentation isn’t just about aesthetics; it actually dictates how the flavors hit your palate. Ladle the piping hot, steaming bhaji onto a shallow plate or a traditional partitioned metal street platter. Immediately create a small well in the center of the curry and drop a fresh pat of butter into it, watching it slowly melt and swirl across the top.
Arrange your hot, glistening, buttery pav right next to the curry. On the side of the plate, create a neat pile of finely diced raw red onions and a generous heap of fresh, bright green coriander leaves. Finally, place a couple of juicy lemon wedges right on the edge.
To eat it properly, squeeze the fresh lemon juice across the hot bhaji, scatter a handful of the raw onions and coriander directly over the top for that essential crisp texture, and tear off a piece of the warm, buttery pav. Dip the bread deep into the rich curry, ensuring you catch some of the raw onions in the scoop. The combination of the hot, spicy, velvety curry, the sweet crunch of the onions, the bright tang of the lemon, and the rich, comforting embrace of the toasted bread is nothing short of pure bliss.
Why the Homemade Journey Trumps the Restaurant Experience
While going out to eat street food is always a fun adventure, there is something profoundly satisfying about mastering this iconic dish within the walls of your own kitchen. When you cook pav bhaji at home, you become the absolute master of the ingredients. You can completely control the quality of the oil and butter, ensure the vegetables are incredibly fresh, and dial back the artificial food colorings that many commercial kitchens use to get that bright red hue.
Ultimately, pav bhaji is a meal designed for community and shared happiness. It is casual, messy, incredibly comforting, and deeply conversational. It is the perfect centerpieces for a lazy Sunday family lunch, a lively rainy-day get-together, or a casual weekend dinner party with close friends. When you bring a massive, steaming pot of homemade bhaji to the table alongside a towering platter of hot, buttery bread, you aren’t just serving dinner—you are creating a beautiful, comforting memory that your loved ones will talk about for weeks to come.
FAQs
1.What makes pav bhaji taste like restaurant-style pav bhaji?
Restaurant-style pav bhaji usually tastes richer because of the butter, the well-cooked onion-tomato masala, and the soft mashed vegetable texture. Proper garnishing and toasted pav also play a major role in creating the familiar restaurant flavor.
2.Can I make pav bhaji without a pressure cooker?
Yes, you can boil or steam the vegetables in a regular pot until they become soft. A pressure cooker simply makes the process faster, but it is not required. The important thing is that the vegetables are cooked enough to mash easily.
3.Which vegetables are essential for pav bhaji?
Potatoes and tomatoes are the most important vegetables for authentic flavor and texture. Cauliflower, peas, and capsicum are also commonly used because they add body, color, and taste. You can adjust the mix slightly, but these vegetables create the classic result.
4.How do I make pav bhaji thicker?
If your bhaji is too thin, simmer it longer so the liquid reduces. You can also mash the vegetables a little more to make the texture smoother and thicker. Adding more butter at the end can also improve richness, though it will not thicken the bhaji by itself.
5.Can I make pav bhaji less spicy?
Yes, you can reduce the amount of chili powder and green chilies. You can also increase the potato and tomato proportion slightly to soften the spice. Pav bhaji is easy to customize, so you can make it mild enough for children or people who prefer gentle flavors.


Leave a Reply